Hey! I'm working on a project right now that I used encaustic wax painting for, and I thought I'd show you how to do it. Everytime I think of doing it, I think it's going to be a huge hassle, but it's not. It's really fun, and straight-forward.
Here's what you need:
beeswax
oil paint
tin cans (one for every colour you plan on using)
Wooden panel/canvas
drop sheet (if you're as messy as I am)
optional: you can use things like lighters, blow torches, scraping tools, and whatever else you can think of to shape the wax, or reheat it, melt it, scratch into it, wipe paint into it- it's very forgiving and very experimental. The nice thing about it, is that if you don't like what you've done, wait for it to cool and scrape it off. Not only can you scrape off what you don't like, but you can reuse it by making a 'dump can' where you put all your scrapings to reheat.
I use this beeswax which is available at Curries:

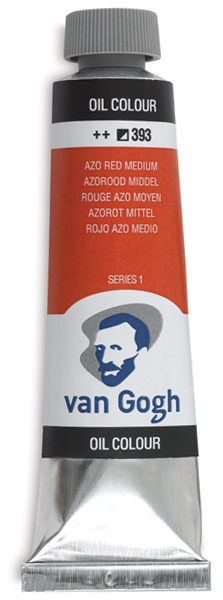
And I use these oil paints, although if you're doing this and don't have oil paints- the large tubes are wholly unnecessary. You barely need any paint to do this. Just a little squirt.
the following things you will need, and you'll want to find ones you never want to use again because if you're planning on cleaning this up, good luck and it will be a hassle every time- we just found ours at thrift stores and keep them for encaustic only:
an electric frying pan
paint brushes (poor quality is fine, probably better because they will indefinitely have wax on them)
knives, ladles

Set up:
Choose how many colours you want to use, and choose a can for each one. Place a tiny squirt (I'd say smaller than a pea, you can always add more later...) of your pigment into the can and a chunk of beeswax. Again, don't worry too much about quantity- you can add more later if the consistency feels wrong, or you want thinner colours, or you've used too much paint. It'll take some experimenting.
Set your cans aside.
Set your electric frying pan to 200-220 F, I like 220 but it will depend on your frying pan and how you like the consistency of your wax. Don't go hotter.
Place a chunk of beeswax in your electric frying pan, when it melts you want between 1/2" to an inch covering the bottom of your pan. Once it has melted, you can place the cans in and the beeswax in them will melt as well. (After the first time set up, you don't need to remove the cans when heating it up because they will have wax under and around them). When the wax in the cans has melted, stir them up to see your colours.
This set up works well because you can use the wax in the bottom for an uncoloured wax if you want to use it, and you can ladle it into the cans if your cans are getting low. Try not to get paint in there!

 The coolest thing (I think) about encaustic is that you can stick anything into it and it will stay. For example, with this assignment I did a google maps printout of an abandoned farm in Alliston. I laid it down on my clear layer of wax, and then painted the wax on over it to hold it in place. And that's it- it will dry and hold the image there. I've done this with money, fabric, paper, photos, etc. The possibilities are endless! haha.


Your brushes will have to stay waxy. I try to get as much off as I can, then I keep them in a sock- I usually do one brush for each colour.
And when you turn off the fryer, and it hardens it will look like this. All you have to do next time is plug it in!
Here's what you need:
beeswax
oil paint
tin cans (one for every colour you plan on using)
Wooden panel/canvas
drop sheet (if you're as messy as I am)
optional: you can use things like lighters, blow torches, scraping tools, and whatever else you can think of to shape the wax, or reheat it, melt it, scratch into it, wipe paint into it- it's very forgiving and very experimental. The nice thing about it, is that if you don't like what you've done, wait for it to cool and scrape it off. Not only can you scrape off what you don't like, but you can reuse it by making a 'dump can' where you put all your scrapings to reheat.
I use this beeswax which is available at Curries:
And I use these oil paints, although if you're doing this and don't have oil paints- the large tubes are wholly unnecessary. You barely need any paint to do this. Just a little squirt.
the following things you will need, and you'll want to find ones you never want to use again because if you're planning on cleaning this up, good luck and it will be a hassle every time- we just found ours at thrift stores and keep them for encaustic only:
an electric frying pan
paint brushes (poor quality is fine, probably better because they will indefinitely have wax on them)
knives, ladles
Set up:
Choose how many colours you want to use, and choose a can for each one. Place a tiny squirt (I'd say smaller than a pea, you can always add more later...) of your pigment into the can and a chunk of beeswax. Again, don't worry too much about quantity- you can add more later if the consistency feels wrong, or you want thinner colours, or you've used too much paint. It'll take some experimenting.
Set your cans aside.
Set your electric frying pan to 200-220 F, I like 220 but it will depend on your frying pan and how you like the consistency of your wax. Don't go hotter.
Place a chunk of beeswax in your electric frying pan, when it melts you want between 1/2" to an inch covering the bottom of your pan. Once it has melted, you can place the cans in and the beeswax in them will melt as well. (After the first time set up, you don't need to remove the cans when heating it up because they will have wax under and around them). When the wax in the cans has melted, stir them up to see your colours.
This set up works well because you can use the wax in the bottom for an uncoloured wax if you want to use it, and you can ladle it into the cans if your cans are getting low. Try not to get paint in there!
Now to start painting!
You want to start with one layer of plain wax on a panel. Panels are best for these, I tried canvas once- it was ok, but I found the wood works much better.
The coolest thing (I think) about encaustic is that you can stick anything into it and it will stay. For example, with this assignment I did a google maps printout of an abandoned farm in Alliston. I laid it down on my clear layer of wax, and then painted the wax on over it to hold it in place. And that's it- it will dry and hold the image there. I've done this with money, fabric, paper, photos, etc. The possibilities are endless! haha.
I also used burlap in this one later on. You can also make some neat textures by pressing textures into the wax, or drip wax onto it to create little mountains and hills, or valleys.
I like this method: you can scratch (with a knife or toothpick or whatever) little designs into the wax, then take a rag and dip oil paint onto it (not wax paint) and when you wipe the rag over your designs, it will leave paint in the tracks and your image will appear. I think it's simply magical. There are so many cool techniques you can do with this, and it's so easy, and like I said- easy to experiment with and easy to redo things.
Your brushes will have to stay waxy. I try to get as much off as I can, then I keep them in a sock- I usually do one brush for each colour.
And when you turn off the fryer, and it hardens it will look like this. All you have to do next time is plug it in!
No comments:
Post a Comment
I appreciate your comments & feedback!! Please feel free to leave some here.